分类
Uncategorized

How to Avoid Contamination When Using Diamond Pads

How to Avoid Contamination When Using Diamond Pads
When working with diamond pads, maintaining a clean and controlled environment is essential to achieving high-quality results and prolonging the lifespan of your equipment. Whether you’re polishing concrete, granite, or other materials, contamination can easily occur, leading to surface defects and reduced efficiency. But don’t worry – avoiding contamination is simpler than it sounds. Let’s explore some key strategies to keep your diamond pads in top condition and prevent contaminants from interfering with your work.
The first step in avoiding contamination starts before you even begin using your diamond pads. It’s crucial to inspect the surface you’re working on thoroughly. Any dirt, dust, or debris can transfer onto the diamond pad, causing imperfections on the polished surface. You should clean the area properly before starting. A quick sweep with a vacuum or a mop can make a significant difference. If you’re working with concrete or stone, consider using a degreaser or a mild detergent to remove any oils or grime that could cause the diamond pad to slip or wear unevenly.
Another effective strategy is to monitor the environment in which you’re working. When you’re using diamond pads, a clean workspace is essential. Airborne dust or dirt can quickly land on the surface of your pads, potentially scratching or damaging the material you’re polishing. You can minimize airborne contaminants by using fans, dust extractors, or even a tarp to cover your work area when possible. This might seem like an extra effort, but it goes a long way in preventing problems down the line.

How to Avoid Contamination When Using Diamond Pads
The condition of your diamond pads themselves is another critical factor to consider. Contamination can also happen when pads become clogged with material buildup. Over time, the tiny diamond particles on the pad’s surface can get covered in dust and slurry, which can affect their performance. Regularly cleaning your pads after each use helps maintain their cutting efficiency and ensures you get the best results. Most manufacturers recommend cleaning diamond pads with water or a mild cleaner to rinse off any debris. Be sure to check the manufacturer’s guidelines for specific cleaning instructions.
In some cases, contamination may arise from using improper tools or the wrong type of diamond pad for a particular material. If you use the same pad on multiple materials without cleaning it thoroughly in between, you risk transferring contaminants from one material to another. For example, if you’re polishing concrete after stone and don’t clean the pad properly, the residual material from the stone can transfer onto the concrete surface, leading to stains or uneven finishes. Having dedicated pads for specific materials and keeping them clean between uses can eliminate this risk.
Even the way you handle your diamond pads matters. Oils from your hands, dust from your clothes, and any other contaminants you might carry can easily transfer to the pad. It’s a good idea to wear gloves when handling your diamond pads and avoid touching the working surface of the pad. If you accidentally touch the pad with your hands, give it a quick rinse to prevent oils or dirt from affecting its performance.
How to Avoid Contamination When Using Diamond Pads
The water you use during polishing is another hidden culprit in contamination. When working with wet diamond pads, the quality of water can impact the results. Hard water, for instance, can leave mineral deposits on both the surface you’re polishing and the pad itself, leading to a reduced lifespan of your equipment. Ideally, you should use filtered or distilled water for wet polishing to avoid this issue. Additionally, always ensure that the water you’re using is free from any debris, as even tiny particles can interfere with the polishing process and cause scratches.
Lastly, if you’re working in a highly regulated environment or dealing with particularly sensitive materials, such as those requiring food-grade finishes, it’s crucial to follow specific contamination control procedures. In such cases, consider using dedicated, clean-room facilities or adhering to industry-specific guidelines to prevent contamination. This may involve using special containment equipment, ensuring air filtration, or even wearing protective suits to guarantee a contaminant-free result.
By staying mindful of these factors, you can avoid the common pitfalls that lead to contamination when using diamond pads. Whether you’re a seasoned professional or a DIY enthusiast, taking the time to prepare your workspace, maintain your pads, and stay conscious of the environment can make all the difference in the quality of your finish. Not only will this help you achieve a flawless surface, but it will also ensure that your diamond pads perform at their best for years to come.

How to Avoid Contamination When Using Diamond Pads

分类
Uncategorized

Polishing River Rocks for Landscaping with Diamond Pads

Polishing River Rocks for Landscaping with Diamond Pads
River rocks are a popular choice for landscaping due to their natural beauty, durability, and versatility. Whether used in garden beds, pathways, water features, or as decorative accents, they bring a timeless elegance to outdoor spaces. However, to truly make these rocks stand out, especially when they are part of a prominent design, polishing is a crucial step. Polishing river rocks enhances their appearance, giving them a glossy, smooth surface that highlights their inherent colors and textures. One of the most effective tools for achieving this polished look is diamond pads.
Diamond pads, specifically designed for polishing stones, are increasingly being used by landscapers and DIY enthusiasts alike to elevate the aesthetics of river rocks. These pads work by gently grinding the surface of the rocks, smoothing out rough edges, and bringing out the full depth of their color and natural beauty. What makes diamond pads particularly advantageous is their ability to provide a high-quality finish with minimal effort, making them a must-have for anyone looking to perfect the appearance of their landscaping stones.

Polishing River Rocks for Landscaping with Diamond Pads
To get started, it’s important to understand the different grades of diamond pads available. These pads come in various grit sizes, ranging from coarse to ultra-fine. The choice of grit will depend on the condition of the river rocks and the desired final outcome. For rocks with rough or jagged surfaces, a coarse grit pad is used first to remove any imperfections. Once the rough edges have been smoothed out, the next step is to gradually work through finer grit pads to refine the surface and bring out the shine. A fine grit diamond pad will give the rock a polished, glossy finish, perfect for creating a sleek, professional look in any landscape design.
Polishing River Rocks for Landscaping with Diamond Pads
When preparing river rocks for polishing, the process begins with cleaning. Dust, dirt, and any loose debris should be removed from the rocks to ensure that the polishing process is smooth and effective. A simple rinse with water or using a soft brush to scrub the surface is usually sufficient. After cleaning, the rocks should be allowed to dry completely before beginning the polishing process.
The key to using diamond pads effectively lies in applying the right amount of pressure and maintaining consistent movement during the polishing process. Too much pressure can cause uneven results, while too little can make the process inefficient. It’s also important to keep the pads and rocks damp throughout the process to prevent heat buildup, which can affect the quality of the finish. As you move through the grits, always use a circular motion, ensuring that each section of the rock receives equal attention. For best results, work your way through the pads, starting from the coarsest grit and gradually moving to finer pads, allowing each stage to smooth out the surface progressively.
Polishing River Rocks for Landscaping with Diamond Pads
One of the key advantages of polishing river rocks with diamond pads is the speed and efficiency of the process. While traditional polishing methods might require a lot of time and elbow grease, diamond pads allow landscapers to achieve the same, if not better, results in a fraction of the time. This not only saves time but also makes it easier to achieve a consistent, professional look across a large area of rocks.
Another benefit is that diamond pads are designed to last for a long time. Unlike some other types of pads or abrasive tools, diamond pads are extremely durable and resistant to wear, meaning they can handle multiple polishing jobs without degrading. This makes them a cost-effective investment for anyone who frequently works with stones and other hard materials in landscaping projects.
The versatility of diamond pads extends beyond just polishing river rocks. They can also be used to polish other natural stones, such as granite, marble, and limestone, making them a valuable tool for any landscaper or stone enthusiast. Whether you’re working on a small garden project or designing a large-scale outdoor area, diamond pads offer the precision and reliability needed to create stunning results every time.
Incorporating polished river rocks into your landscaping design can transform a simple garden or outdoor space into a striking visual masterpiece. The smooth, shiny surfaces of the rocks not only add a touch of sophistication but also reflect light beautifully, creating an eye-catching focal point. Whether used around the edges of a pond, along a walking path, or as part of a decorative feature, polished river rocks can help elevate the overall aesthetic of your landscape.
Using diamond pads to polish river rocks is a straightforward yet highly effective way to enhance the beauty and longevity of your landscaping elements. With a little practice and the right equipment, you can easily turn rough, unpolished stones into smooth, glossy features that will shine in your garden for years to come.

分类
Uncategorized

Regular Maintenance Routines for Diamond Pads

Regular Maintenance Routines for Diamond Pads

Regular Maintenance Routines for Diamond Pads
Diamond pads, often the unsung heroes in the polishing and surface finishing industries, play an essential role in delivering precision results. Whether you’re working with concrete, stone, glass, or other hard surfaces, these pads provide unmatched durability and efficiency. However, like any high-performance tool, they require regular maintenance to continue performing at their best. Without proper care, even the toughest diamond pads can wear down prematurely, losing their cutting and polishing effectiveness. So, how can you ensure that your diamond pads stay in optimal condition for as long as possible? Here’s a breakdown of key maintenance routines.
Regular Maintenance Routines for Diamond Pads
One of the most critical aspects of caring for diamond pads is cleaning them after every use. This might seem straightforward, but it’s crucial to remember that diamond pads, especially those used in aggressive polishing or grinding tasks, can accumulate dust, debris, and other materials. These particles can clog the surface of the pad, reducing its ability to cut or polish effectively. To clean the pads, use a soft brush or compressed air to remove any leftover debris. For tougher buildup, a solution of water and mild detergent can be applied, followed by a thorough rinse. Avoid harsh chemicals or abrasive cleaning agents, as these can degrade the pad’s surface over time.
Another important aspect of maintenance is inspecting the pads for wear and tear. Over time, the diamonds embedded in the pad’s surface may wear down, reducing their cutting efficiency. This is particularly common with pads that are used on rough or uneven surfaces. Regular inspection can help you spot early signs of wear, such as reduced effectiveness or visible damage to the diamond particles. If you notice that the pad isn’t performing as well as it once did, it may be time to replace it or rotate it to a different task. Keeping track of how often you use each pad will help you determine its lifespan and schedule timely replacements.
Regular Maintenance Routines for Diamond Pads
Proper storage is also

分类
Uncategorized

Diamond Pads for Polishing in Large Public Spaces

Diamond Pads for Polishing in Large Public Spaces

Diamond Pads for Polishing in Large Public Spaces
When it comes to maintaining the pristine look of large public spaces, there’s one solution that stands out among the rest: diamond pads for polishing. These high-performance tools are revolutionizing the way we care for floors in environments like airports, shopping malls, hotels, and corporate buildings. Their unparalleled durability, efficiency, and ability to bring out the natural beauty of floors make them an essential tool for any facility management team aiming for perfection.
In large public spaces, floors take a lot of punishment. They’re constantly exposed to heavy foot traffic, spills, dirt, and the general wear and tear of daily life. Without the right tools, keeping floors looking brand new can feel like an impossible task. That’s where diamond polishing pads come in, offering a combination of toughness and finesse that is perfect for high-traffic environments.
What makes diamond pads so effective? It all comes down to the material itself. Diamonds are the hardest known material, and when embedded in polishing pads, they provide an ultra-durable surface capable of smoothing, grinding, and polishing floors to a glossy finish. The small diamond particles work like tiny abrasives, gradually buffing out imperfections, stains, and scuffs without causing damage to the underlying surface. Whether you’re working with marble, granite, terrazzo, or concrete, diamond pads are versatile enough to be used on a wide range of materials.
Diamond Pads for Polishing in Large Public Spaces
One of the key advantages of using diamond pads in public spaces is their ability to provide a high-quality finish with minimal effort. Unlike traditional polishing methods, which may require multiple passes or the use of harsh chemicals, diamond pads can achieve a mirror-like shine in a fraction of the time. They are also incredibly efficient when it comes to removing surface scratches and marks, which are often a major concern in high-traffic areas. In settings like airports or shopping centers, where first impressions matter, the long-lasting, gleaming shine provided by diamond pads ensures that visitors are always greeted by a clean, polished environment.
Another benefit is the cost-effectiveness over time. While the initial investment in diamond pads may be higher than other polishing solutions, their longevity and performance far outweigh the cost. Traditional pads or cleaning methods often require frequent replacements, but diamond pads are built to last. They can handle large areas without the need for constant replacement, reducing maintenance costs significantly in the long run. Additionally, the time saved during the cleaning process is another factor that contributes to cost savings. Maintenance crews can cover more ground in less time, which is crucial for busy spaces that need to stay open and operational at all times.
Maintenance in large public spaces often involves working with tight schedules. These areas can’t afford to close for hours on end while floors are being polished, so a solution that minimizes downtime is crucial. Diamond pads fit this need perfectly. The process of polishing floors with diamond pads is quick and efficient, meaning maintenance crews can polish floors during off-hours or at night, without causing disruptions to the daily activities in the space. Because the pads work so efficiently, there’s no need for long periods of waiting or excessive drying time.
Diamond Pads for Polishing in Large Public Spaces
Beyond functionality, diamond polishing pads are also an eco-friendly option. Many traditional cleaning solutions use harsh chemicals that can have a negative impact on the environment. In contrast, diamond pads require little to no chemicals to achieve stunning results. By relying on the mechanical action of the diamonds themselves, these pads allow for a more sustainable, eco-conscious approach to floor maintenance. For public spaces looking to reduce their environmental footprint, this is a huge advantage.
Furthermore, using diamond pads helps maintain the floor’s structural integrity over time. Unlike chemical polishes or abrasive methods that might weaken or erode the surface, diamond pads gently remove dirt and imperfections while preserving the material underneath. This ensures that floors remain not only beautiful but also strong and durable for many years to come.
For managers of large public spaces, choosing the right polishing solution is critical. The right tools can make a significant difference in both the appearance and upkeep of the environment. Diamond pads offer a sophisticated, efficient, and long-lasting solution to the challenges of maintaining floors in high-traffic areas. Whether it’s a sleek marble floor in a luxury hotel lobby or a polished concrete surface in a bustling airport terminal, diamond pads for polishing provide the shine, durability, and reliability that every large public space needs to stay at its best.
In summary, if you’re responsible for the maintenance of a large public space, consider switching to diamond pads for your polishing needs. They provide superior results, save time, and reduce long-term costs while also offering an environmentally friendly and sustainable solution. By choosing diamond pads, you’re not just maintaining floors; you’re investing in the beauty, longevity, and cleanliness of the space, ensuring that it always leaves a positive impression on visitors.

分类
Uncategorized

Tips for Reducing Dust with Dry Polishing Pads

Dust is an inevitable byproduct of many polishing processes, and when it comes to using dry polishing pads, keeping the dust under control can feel like a never-ending challenge. But with a few smart techniques and the right approach, you can significantly reduce the amount of dust generated during dry polishing. Whether you’re working on floors, countertops, or other surfaces, these practical tips will help you improve air quality, reduce cleanup time, and protect both your equipment and health.

Tips for Reducing Dust with Dry Polishing Pads
One of the most effective ways to cut down on dust when using dry polishing pads is to start with the right equipment. A high-quality dry polishing pad is key. Look for pads designed specifically for minimal dust generation. These pads tend to have better dust containment features, such as specialized designs that trap and hold particles instead of letting them fly around. Choosing pads with good dust reduction capabilities will ensure you’re not just moving dust around but actually minimizing its production in the first place.
A key aspect to consider is the grit size of your polishing pad. Generally, finer grits tend to produce less dust because they generate less friction. However, if you’re working on tough materials or need to remove more material quickly, a coarser grit might be necessary. When using a coarser pad, be mindful of the speed and pressure you apply, as they can directly influence how much dust is created. Often, polishing with a light touch and slow speed helps reduce the amount of dust kicked up, even with a more aggressive pad.
The environment where you are working also plays a critical role in dust control. If possible, work in a well-ventilated area. Good airflow helps prevent dust from accumulating and spreading through the air, especially in smaller, closed-off spaces. Open windows or use exhaust fans to keep the air moving. If you’re polishing in a smaller area without natural ventilation, consider using a vacuum system designed for dry polishing. These vacuums attach directly to your polishing equipment and work by sucking up dust as you polish. This not only helps keep the workspace cleaner but also makes the process far more pleasant by reducing airborne particles.
Another tip for reducing dust is to frequently clean your pads during use. Dust buildup on the surface of the polishing pad can quickly turn into a source of more dust. By periodically removing the dust from the pad, you ensure that it works efficiently without becoming overloaded. A simple tap or brushing of the pad will help, but make sure to check the manufacturer’s instructions to ensure you’re not damaging the pad in the process.
It’s also important to keep the surface you’re working on in mind. Dry polishing pads are best used on surfaces that are clean and free from excess debris. Dirt or small stones on the surface can create additional dust when they come into contact with the pad. Before beginning the polishing process, always clean the surface thoroughly to minimize this risk. A quick sweep or vacuum of the area is a small effort that can make a big difference in how much dust gets kicked up.
Tips for Reducing Dust with Dry Polishing Pads
For those concerned about air quality or working in environments where dust control is critical, consider investing in a dust collection system. These systems are more than just vacuums—they are engineered to capture airborne particles before they spread throughout the room. While this may be an additional investment, it can save a lot of headaches down the road, especially if you’re working on larger projects or in an industrial setting.
Don’t forget the importance of wearing protective gear while polishing. Even with all these tips in place, a small amount of dust may still be generated, and it’s always better to be safe than sorry. Dust masks or respirators are essential, especially when working in environments with limited ventilation. Eye protection is also a must, as dust particles can irritate or injure the eyes.
Tips for Reducing Dust with Dry Polishing Pads
Finally, remember that dry polishing is not just about reducing dust—it’s about creating the best finish possible. By using the right tools, maintaining your equipment, and setting up your work area thoughtfully, you not only reduce dust but also improve the overall quality of your polishing job. In the end, the smoother the process, the more professional the results, and the less dust you’ll need to worry about sweeping away.
By following these tips, you’ll be well on your way to reducing dust when using dry polishing pads. Dust-free polishing not only leads to cleaner air and a healthier workspace but also enhances the quality of your results. It’s a small effort with big rewards, both for you and your environment.

分类
Uncategorized

How to Remove Residue Buildup from Diamond Polishing Pads

How to Remove Residue Buildup from Diamond Polishing Pads
Diamond polishing pads are some of the most effective tools for achieving a high-gloss finish on a variety of surfaces, from concrete floors to marble countertops. However, with repeated use, these pads can accumulate residue that hinders their performance, leaving behind less-than-ideal results. Whether you’re working on a professional job or a DIY project, it’s essential to keep your diamond pads clean and free from debris to maintain their effectiveness. If you’ve noticed a buildup on your pads, here’s how to restore them to their optimal condition.
The first step is understanding the nature of the residue. Polishing pads can accumulate a range of materials, including concrete dust, slurry, oils, and other substances. Over time, these particles combine and stick to the surface of the diamond pads, creating a hardened layer that diminishes the pads’ ability to deliver a smooth, shiny finish. While it may seem like the pads are past their prime, a little maintenance can make them as good as new.
Start by soaking your diamond polishing pads. Soaking is one of the easiest and most effective ways to loosen hardened residue. You can use warm water mixed with a bit of detergent or a specialized cleaning solution designed for stone and concrete polishing. The warmth helps break down oils and other sticky substances, while the detergent aids in lifting the grime. Allow the pads to soak for 20-30 minutes, giving the solution time to penetrate the buildup.
Once the pads have soaked long enough, it’s time to give them a good scrubbing. Use a soft brush—something like a nylon scrub brush works best. The key here is to avoid anything too abrasive that could damage the diamond segments. Gently scrub the surface of the pads, working in circular motions. Focus on the areas where you notice the most residue buildup, but don’t forget to scrub the entire surface for an even clean. The goal is to loosen the residue without compromising the integrity of the pad.
For stubborn residue, a stronger cleaning solution may be necessary. There are commercial cleaners specifically designed for removing residue from diamond polishing pads. These cleaners often contain acids or solvents that break down concrete slurry, oils, and other materials. Be sure to follow the manufacturer’s instructions when using such products, as they can be potent and require careful handling. Alternatively, a mild acid like vinegar can also be used in small amounts to help dissolve concrete residue. However, it’s important to test any chemical solution on a small area of the pad first to ensure it doesn’t cause any damage.
After you’ve scrubbed the pads, rinse them thoroughly with clean water. It’s essential to remove all cleaning agents, as any leftover chemicals can interfere with the polishing process and potentially damage the surface you’re working on. After rinsing, let the pads dry completely before using them again. This drying period ensures that no moisture remains trapped inside the pad, which could affect the pad’s performance or lead to further residue buildup.

How to Remove Residue Buildup from Diamond Polishing Pads
If the residue persists after cleaning, it might be time to consider a deeper solution. A diamond pad can sometimes become so clogged with residue that regular cleaning is no longer enough. In such cases, resurfacing the pad might be necessary. Some professionals recommend using a “dressing” tool designed specifically for diamond pads. These tools are used to remove worn or clogged layers from the pad, revealing fresh, clean diamond segments. Resurfacing not only helps to restore the pad’s cutting ability but also extends its lifespan.
For those who prefer to avoid aggressive cleaning methods, prevention is always the best strategy. After each use, take a few moments to rinse the pads with water to remove excess residue. This simple step can save you a lot of time and effort in the long run. Additionally, using the right amount of water during the polishing process can help prevent the buildup of excessive slurry and debris, keeping your pads cleaner for longer.
How to Remove Residue Buildup from Diamond Polishing Pads
Maintaining your diamond polishing pads is essential to ensuring consistent, high-quality results over time. With the right care, these pads can last for many uses, continuing to deliver the smooth, glossy finish you need for your projects. By following these cleaning steps and staying proactive about pad maintenance, you can keep your diamond polishing pads in top shape and maximize their efficiency. Don’t let residue buildup slow you down—take action today and enjoy a cleaner, more effective polishing experience.
How to Remove Residue Buildup from Diamond Polishing Pads

分类
Uncategorized

Setting Up a Polishing Station at Home or Workshop

Setting Up a Polishing Station at Home or Workshop
Whether you’re a seasoned DIY enthusiast or just starting to dabble in the world of home improvement, a well-organized polishing station can make all the difference. Whether you’re polishing metal, wood, plastic, or even stones, having a dedicated space can streamline the process, improve results, and make your work more enjoyable. The key is setting up a space that suits your specific needs, giving you the tools and environment to achieve professional-quality finishes.
Creating your polishing station doesn’t need to be a complicated or expensive process. With a few essential components and a little creativity, you can transform any corner of your home or workshop into a space that encourages efficiency and precision. Here’s how you can get started.
Choose the Right Location
The first step in creating your polishing station is finding the perfect location. Ideally, your space should be well-ventilated, free from dust, and spacious enough for your tools, materials, and workspace. A workbench is often a great starting point—something sturdy that can handle the vibrations of a polishing tool without wobbling. If you don’t have a designated workbench, any stable surface will do. Just ensure that it’s large enough to accommodate your items and leave some room for maneuvering.

Setting Up a Polishing Station at Home or Workshop
It’s also a good idea to position your polishing station near an electrical outlet, as many polishing tools require a power source. If your workspace is dim, consider installing good overhead lighting to prevent shadows from interfering with your work.
Select the Right Tools
When setting up your polishing station, the most important investment will be in the tools you’ll be using. The type of polishers you choose will depend on what materials you plan to work with. For example, a rotary tool with polishing attachments works wonders for metal, while an orbital sander with buffing pads is ideal for smooth wooden surfaces.
Here’s a basic list of essential tools:
1. Polisher: Choose a high-quality polisher based on the material you’re working with. For metals, a rotary polisher may be best, while a random orbital polisher is gentler and more versatile for various surfaces.

2. Buffing Pads and Brushes: Stock up on a variety of buffing pads and brushes. Different grits of pads will help you work through different stages of polishing, from coarse to fine finishes.

3. Polishing Compounds: Depending on your project, you’ll need polishing compounds that match the material you’re working on. For example, metal polishing compounds, waxes for wood, and specific compounds for plastics or stones.
4. Safety Gear: Never compromise on safety. Always have eye protection, dust masks, and ear protection, especially if you’re working with power tools that generate dust and noise.
Organize Your Workspace
Once you have your tools, it’s time to get organized. Storage bins, shelves, and pegboards can keep your tools and compounds easily accessible. You want everything within arm’s reach but also clearly labeled or grouped by use. For example, place all your metal-polishing compounds together, separate from your wood-specific materials.
A rolling cart or tool caddy can be a great addition if you need to move your supplies around. Keeping your station tidy will not only help you find tools more easily but also minimize distractions during long polishing sessions.
Safety Precautions
Safety is paramount when setting up your polishing station. The polishing process can generate a significant amount of dust, which may be harmful to your lungs if inhaled over time. Wearing a dust mask is crucial, and you may even want to invest in a dust collection system or a simple shop vac with a dust bag to help keep your workspace cleaner and safer.
Along with a dust mask, wear safety glasses to protect your eyes from flying debris, especially when working with metal or harder materials. Earplugs or earmuffs are also essential, as the noise from power polishers and sanders can be quite loud.

Setting Up a Polishing Station at Home or Workshop
Test Your Setup
Before you dive into any major projects, it’s always a good idea to test your setup. Start by polishing a small, inexpensive object to get a feel for the process. This will help you determine if everything is functioning as it should and whether your workspace is comfortable. Adjust the positioning of tools, lighting, and storage based on how you work best.
Maintenance and Care
A polishing station is an investment in your craft, and just like any other tool, it needs regular care and maintenance. Make sure to clean your tools after every use to extend their lifespan and maintain optimal performance. Buffing pads can get clogged with compounds, so it’s important to clean them or replace them as necessary.
You’ll also want to periodically check the condition of your workbench or station, making sure that it remains sturdy and functional. If you notice any issues with your polisher or other equipment, address them promptly to avoid potential accidents.
Conclusion
Setting Up a Polishing Station at Home or Workshop
Setting up a polishing station at home or in your workshop can elevate your work to a whole new level. By investing in the right tools, organizing your space, and taking the necessary safety precautions, you’ll be ready to tackle any polishing project with confidence and precision. Whether you’re restoring an old piece of furniture or bringing a dull metal surface back to life, a dedicated polishing station can help you achieve professional-grade results every time.

分类
Uncategorized

How We Handle Large Orders of Diamond Polishing Pads

How We Handle Large Orders of Diamond Polishing Pads
At our company, handling large orders of diamond polishing pads is more than just a business transaction; it’s an opportunity to showcase our commitment to quality, efficiency, and customer satisfaction. Whether it’s a manufacturing plant in need of bulk supplies or a specialty distributor seeking consistent performance, we ensure every step of the process is seamless, from the initial inquiry to the final delivery.

How We Handle Large Orders of Diamond Polishing Pads
When a large order comes through, our team understands that it’s not just about sending out products in bulk. It’s about delivering the right quantity, in the right specifications, and with the kind of precision that can make or break a project. Our diamond polishing pads are crafted with high standards, designed to handle the toughest grinding and polishing tasks. However, it’s how we manage the logistics and customer relations that truly sets us apart.
The first thing we do is ensure that we fully understand the customer’s specific needs. Large orders often come with unique requirements, whether it’s a particular grit size, specialized bonding material, or a custom formulation of diamond content. By working closely with our clients, we guarantee that the polishing pads will meet the exact performance specifications needed. This collaborative approach helps minimize the chance of any surprises later on, ensuring that the client gets exactly what they expect—and more.
Once the specifics are confirmed, we move into the production phase. One of the key factors in handling large orders is our ability to scale. Our state-of-the-art manufacturing facility is equipped with the latest technology, allowing us to produce large volumes of diamond polishing pads efficiently without sacrificing quality. Every pad goes through a stringent quality control process to ensure it meets our high standards. With the help of advanced machinery and expert technicians, we can produce thousands of units quickly, without compromising on the craftsmanship that makes our pads so effective.
As the order is being processed, we keep the lines of communication open with our customers. We understand the importance of meeting deadlines, especially for large-scale operations where any delay can cause a ripple effect on the entire project timeline. That’s why we provide regular updates on the production and shipping schedule, so clients can plan accordingly and avoid any surprises. Our customer service team is always ready to answer any questions and address concerns, ensuring that our clients feel supported every step of the way.
How We Handle Large Orders of Diamond Polishing Pads
When it comes to shipping large orders, we leave nothing to chance. We work with trusted logistics partners who specialize in handling bulk orders, ensuring that the diamond polishing pads are delivered safely and on time. Whether it’s a local delivery or international shipping, we carefully package the products to prevent any damage during transit. The last thing we want is for our clients to receive their orders in less-than-perfect condition. So, we take extra precautions to make sure everything arrives in pristine shape, ready to be used immediately upon arrival.
In addition to fulfilling large orders efficiently, we understand the long-term relationship we’re building with our customers. After the delivery is made, we don’t just walk away. We provide post-sale support to ensure that our diamond polishing pads continue to perform as expected. If any issues arise, we’re here to troubleshoot and offer solutions. It’s this ongoing commitment to quality and service that turns a one-time customer into a repeat client.
Handling large orders of diamond polishing pads requires more than just product knowledge. It’s about understanding the specific needs of each customer, providing expert advice, ensuring timely delivery, and offering ongoing support. Every large order we fulfill is a chance to prove our reliability, expertise, and dedication to excellence. Whether you’re a contractor, distributor, or manufacturer, you can trust that when you place a large order with us, you’re not just getting top-tier products—you’re getting a partnership built on trust and quality.
In the end, it’s not just about getting the job done; it’s about getting it done right. That’s why we’re proud of the way we handle large orders. With attention to detail, a customer-first approach, and a commitment to excellence at every stage, we’re ready to take on any challenge that comes our way. When you choose us for your diamond polishing pad needs, you’re choosing a team that’s as dedicated to your success as you are.

How We Handle Large Orders of Diamond Polishing Pads

分类
Uncategorized

A Beginner’s Guide to Using Diamond Polishing Pads at Home

A Beginner’s Guide to Using Diamond Polishing Pads at Home

A Beginner’s Guide to Using Diamond Polishing Pads at Home
If you’ve ever admired a beautifully polished countertop, floor, or tile, you’ve likely marveled at the smooth, shiny finish that makes surfaces look brand new. Achieving that level of gloss and refinement at home is easier than you might think – thanks to diamond polishing pads. These high-performance tools can give your surfaces a professional-grade finish without requiring you to hire an expensive contractor.
For beginners, it can be intimidating to dive into polishing your floors or countertops with diamond pads. But fear not – with the right guidance, you’ll be able to achieve remarkable results that can transform your home’s surfaces.
What Are Diamond Polishing Pads?
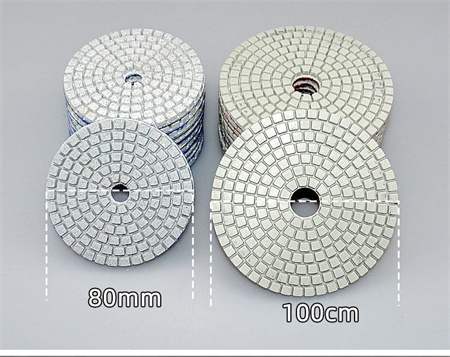
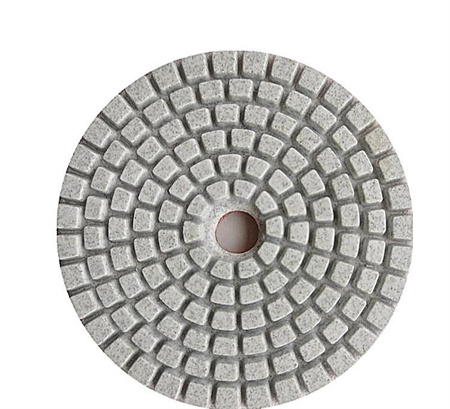
Diamond polishing pads are abrasive pads embedded with tiny diamond particles that are designed to smooth and polish hard surfaces like granite, marble, concrete, and other stone materials. The diamonds give the pad its cutting power, allowing it to remove scratches, stains, and imperfections while creating a glossy finish. What makes these pads stand out is their ability to provide precision and durability, making them suitable for both light touch-ups and more extensive restoration work.
Choosing the Right Diamond Pad
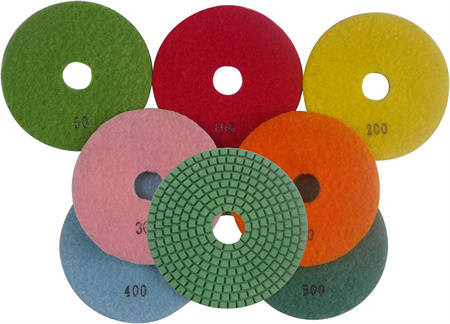
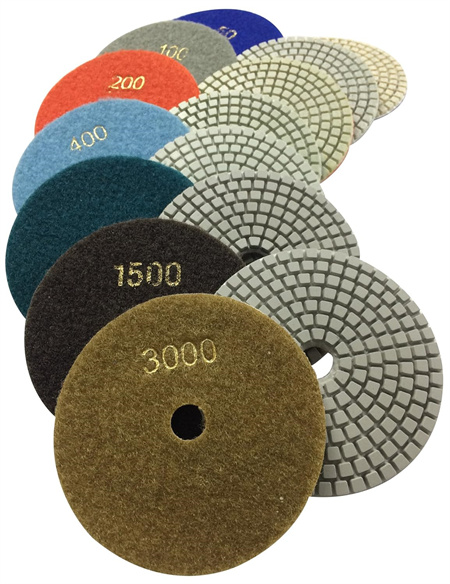
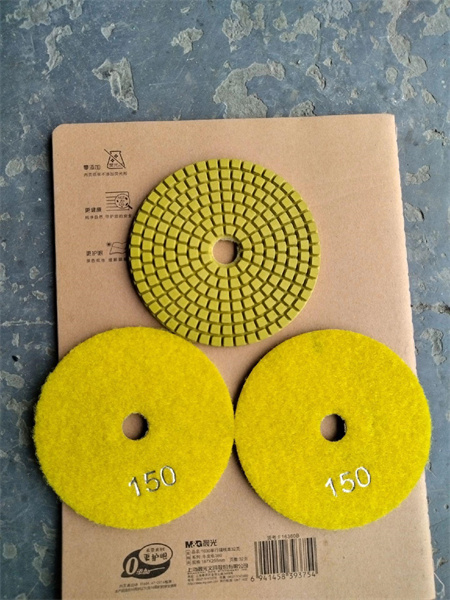
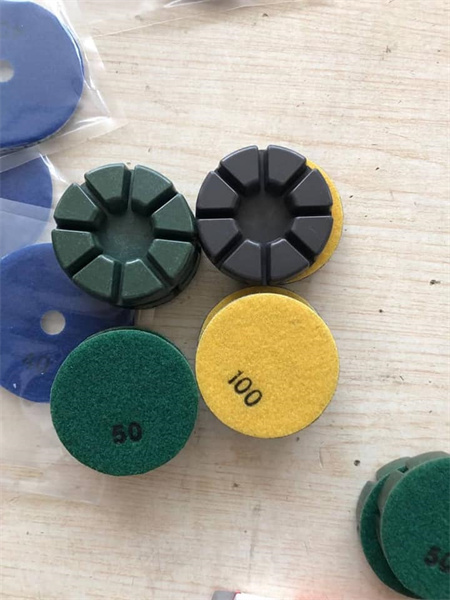
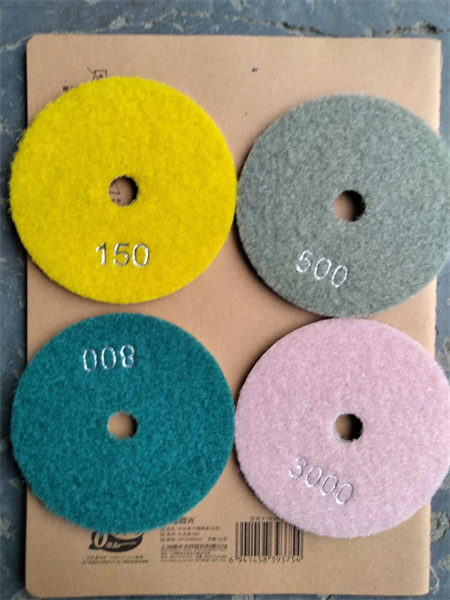
Before you even start polishing, it’s essential to select the right type of diamond polishing pad for your project. They come in various grit sizes, from coarse (lower numbers) to fine (higher numbers).
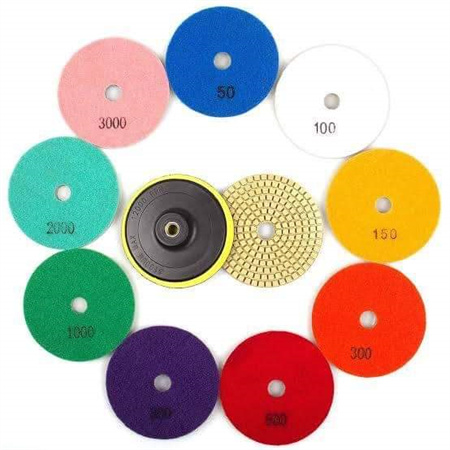
– Coarse pads (50-200 grit) are best for heavy-duty work, such as removing deep scratches, stains, or rough surfaces.
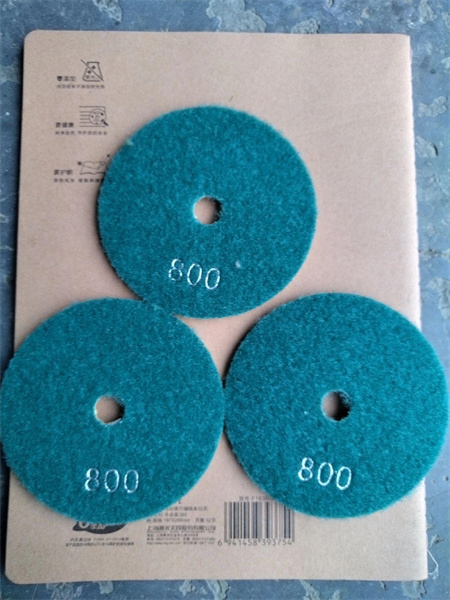
– Medium pads (400-800 grit) are great for smoothing the surface and preparing it for a finer polish.
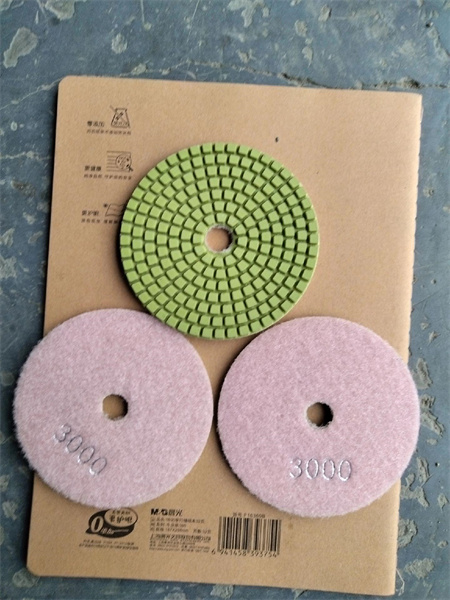
– Fine pads (1500-3000 grit) are used for achieving a high-gloss, mirror-like finish.
For beginners, it’s usually a good idea to start with a medium grit pad and work your way up to finer grits as you get more comfortable with the process.
The Right Equipment
Aside from the diamond polishing pads themselves, you’ll need a few basic tools to get started. A grinder or polishing machine with variable speed settings is essential for applying consistent pressure and speed during the process. If you’re polishing a small surface, you can use a handheld tool or even a drill with a polishing attachment.
You’ll also need water, as wet polishing helps reduce heat buildup, keeps dust down, and helps the pad last longer. Make sure you have access to a hose or spray bottle to keep the surface wet while you work.
A Beginner’s Guide to Using Diamond Polishing Pads at Home
Preparation is Key
Before you start polishing, it’s vital to prep the surface properly. Clean the area thoroughly to remove any dirt, dust, or debris. Any particles left on the surface can scratch the stone during the polishing process, defeating the purpose of using a diamond pad.
For floors or large surfaces, you may want to mark out sections to work in small, manageable areas. This will ensure that you cover the entire surface evenly and don’t miss any spots.
Polishing Process
Now that you’ve chosen your pads and prepared your surface, it’s time to start polishing.
1. Start with the Coarse Pad: If you’re working on a surface with visible imperfections, begin with a coarse pad. Attach it to your polishing machine, set the speed to low, and apply gentle pressure as you move the pad over the surface in circular motions. Always keep the surface wet to minimize dust and heat. As you work, you’ll start to notice the rough patches smoothening out.

2. Switch to a Medium Pad: Once the coarse pad has done its job, switch to a medium grit pad to refine the surface further. This step is important to eliminate any remaining scratches from the coarse pad and further smooth out the surface.
3. Finish with a Fine Pad: To achieve a high-gloss finish, move on to the fine grit pad. This step may take longer, but it’s worth the effort. Keep the surface wet, and work slowly in overlapping circular motions. As you continue polishing, you’ll notice a beautiful shine developing.
4. Buff for Extra Shine: If you want an even more mirror-like finish, you can follow up with a buffing pad. Buffing gives the surface that ultra-glossy look that makes your stone or tile truly pop.
Tips for Success
– Don’t rush: Polishing can be a time-consuming process, and rushing through it will likely lead to uneven results. Take your time and allow each pad to do its job before moving to the next.

A Beginner’s Guide to Using Diamond Polishing Pads at Home
– Stay consistent: Keep the pad moving in overlapping circular motions, and try not to linger too long in one spot. This ensures even pressure and a uniform finish.
– Maintain water flow: Constant water flow is key to preventing the pads from overheating and to keep the dust down. Don’t neglect this step, as it will make the process smoother and less messy.
Clean and Protect
Once you’ve achieved your desired level of shine, take the time to clean the surface thoroughly to remove any slurry or leftover residue. You can use a microfiber cloth or mop for this. Additionally, you might consider sealing the surface, especially for porous materials like marble or granite, to protect the finish and make future cleaning easier.
Final Thoughts
Using diamond polishing pads at home can be a rewarding and cost-effective way to restore and enhance your surfaces. While it may seem challenging at first, with the right preparation, equipment, and technique, you’ll soon be polishing like a pro. So, roll up your sleeves, grab your diamond pads, and enjoy the process of transforming your home’s surfaces into something extraordinary.

分类
Uncategorized

How to Polish Limestone Using Diamond Tools

How to Polish Limestone Using Diamond Tools
Polishing limestone may seem like a daunting task, but with the right approach and the right tools, it becomes a rewarding and satisfying project. Limestone is a beautiful, natural stone that adds a timeless elegance to any space, but it’s also relatively soft compared to other stone surfaces, which means it requires careful handling. To achieve a smooth, glossy finish on limestone, diamond tools are the way to go. These tools are perfect for grinding and polishing, providing both speed and precision. Here’s how to do it right, step by step.
Limestone has a porous texture, and over time, it can accumulate dirt and stains, which dull its natural luster. While you could use traditional polishing methods, diamond polishing pads offer a more efficient and durable solution, delivering a professional-quality result. The fine-grit diamond abrasives gradually smooth the stone’s surface without causing damage, revealing the stone’s true beauty.
Selecting the Right Diamond Tools
Before you start, it’s essential to choose the correct diamond tools. Diamond pads come in various grits, ranging from coarse to fine. Start with a lower grit for heavy grinding and work your way up to finer grits for polishing. For limestone, a typical progression might include 50-grit, 100-grit, 200-grit, and finally, 3000-grit pads. Additionally, you’ll need a variable-speed grinder or polisher. A machine with adjustable speed allows you to control the intensity and prevent overheating the stone.
Preparing the Limestone Surface
Begin by thoroughly cleaning the limestone surface. Sweep away any dust, dirt, and debris. If there are any stains or spots, consider using a stone-safe cleaner. This is crucial because any dirt or grime left behind can interfere with the polishing process, potentially scratching or damaging the stone.
Once the surface is clean, inspect the limestone for any cracks or chips. While diamond tools can smooth the surface, they can’t fix deep structural damage. If there are significant imperfections, these should be repaired first.
Grinding the Limestone
Now it’s time to start the grinding process. Attach the 50-grit diamond pad to your grinder. This coarse grit is ideal for removing surface blemishes, scratches, and uneven areas. Work in small sections and apply even pressure, moving the grinder in a circular or back-and-forth motion. Keep the pad flat against the stone, allowing the diamonds to slowly grind away imperfections. Don’t rush this step, as it’s important to ensure the surface is level and smooth before proceeding to the finer grits.
When grinding, it’s essential to keep the stone surface damp, as this helps prevent the buildup of heat and minimizes the risk of damage. You can use a spray bottle or a wet sponge to maintain moisture on the surface. If the stone starts to dry out, spray a little water to keep it cool. This step also helps reduce the dust generated during grinding.

How to Polish Limestone Using Diamond Tools
Smoothing the Surface
How to Polish Limestone Using Diamond Tools
Once the surface is free from major imperfections, it’s time to move on to the finer grits. Switch to the 100-grit diamond pad and repeat the grinding process. As you progress through each grit level—100, 200, and finally 3000—you’ll notice the surface becoming progressively smoother and shinier. Each finer grit removes the scratches left behind by the previous pad, bringing out the limestone’s natural shine.
How to Polish Limestone Using Diamond Tools
Make sure to clean the surface between each grit change. Dust and residue from the grinding process can create scratches if not removed, so wipe down the limestone with a damp cloth after each stage. Continue working with each successive grit until you reach a level of smoothness and gloss that you’re satisfied with.
Finishing Touches
When the polishing is complete, the limestone surface should have a smooth, almost glass-like finish. If you’re looking for extra sheen, you can use a polishing compound or a diamond resin pad. These products are designed to add an extra layer of gloss, making the stone look even more vibrant.
After polishing, let the limestone surface dry and settle. It’s important to let the stone breathe and allow any remaining moisture to evaporate. You can also apply a stone sealant to protect the polished surface from stains and moisture in the future. Sealants enhance the durability of the limestone and help maintain its polished look.
Tips for Success
1. Patience is key: Polishing limestone can take time, especially if the surface is in poor condition. Don’t rush the process; each step is essential for achieving a perfect finish.
2. Keep the surface wet: Maintaining moisture while working is crucial to prevent overheating and avoid damaging the stone.
3. Wear safety gear: Always wear safety goggles, gloves, and a dust mask to protect yourself from debris and dust.
4. Check your pads: Diamond pads wear down over time, so check them regularly and replace them when necessary. Using worn-out pads will reduce their effectiveness and may even cause damage to the limestone.
5. Test on a small area: If you’re unfamiliar with using diamond tools on limestone, test your technique on a small, inconspicuous area before working on the entire surface.
Polishing limestone with diamond tools is a precise, meticulous task that yields fantastic results. Whether you’re rejuvenating old countertops, flooring, or decorative features, these tools help bring out the beauty and depth of limestone, ensuring it remains a striking addition to any space for years to come. With the right equipment, patience, and technique, you’ll have a polished, gleaming surface that enhances the natural elegance of this timeless stone.