A Beginner’s Guide to Using Diamond Polishing Pads at Home

For beginners, it can be intimidating to dive into polishing your floors or countertops with diamond pads. But fear not – with the right guidance, you’ll be able to achieve remarkable results that can transform your home’s surfaces.
What Are Diamond Polishing Pads?
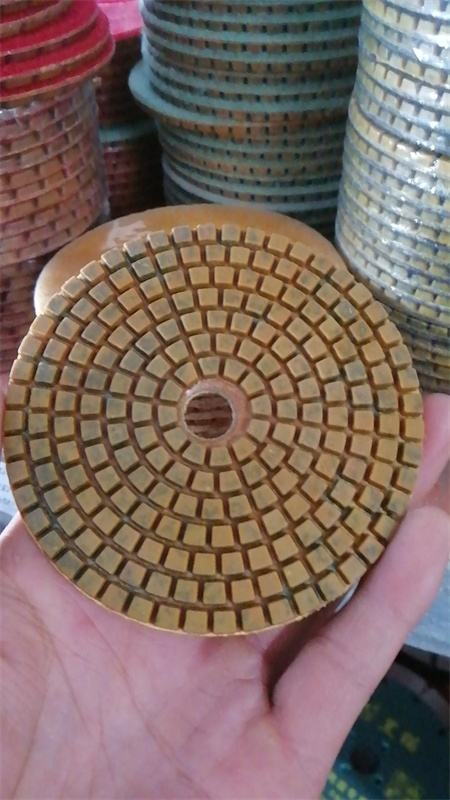
Diamond polishing pads are abrasive pads embedded with tiny diamond particles that are designed to smooth and polish hard surfaces like granite, marble, concrete, and other stone materials. The diamonds give the pad its cutting power, allowing it to remove scratches, stains, and imperfections while creating a glossy finish. What makes these pads stand out is their ability to provide precision and durability, making them suitable for both light touch-ups and more extensive restoration work.
Choosing the Right Diamond Pad
Before you even start polishing, it’s essential to select the right type of diamond polishing pad for your project. They come in various grit sizes, from coarse (lower numbers) to fine (higher numbers).
– Coarse pads (50-200 grit) are best for heavy-duty work, such as removing deep scratches, stains, or rough surfaces.
– Medium pads (400-800 grit) are great for smoothing the surface and preparing it for a finer polish.
– Fine pads (1500-3000 grit) are used for achieving a high-gloss, mirror-like finish.
For beginners, it’s usually a good idea to start with a medium grit pad and work your way up to finer grits as you get more comfortable with the process.
The Right Equipment
Aside from the diamond polishing pads themselves, you’ll need a few basic tools to get started. A grinder or polishing machine with variable speed settings is essential for applying consistent pressure and speed during the process. If you’re polishing a small surface, you can use a handheld tool or even a drill with a polishing attachment.
You’ll also need water, as wet polishing helps reduce heat buildup, keeps dust down, and helps the pad last longer. Make sure you have access to a hose or spray bottle to keep the surface wet while you work.

Before you start polishing, it’s vital to prep the surface properly. Clean the area thoroughly to remove any dirt, dust, or debris. Any particles left on the surface can scratch the stone during the polishing process, defeating the purpose of using a diamond pad.
For floors or large surfaces, you may want to mark out sections to work in small, manageable areas. This will ensure that you cover the entire surface evenly and don’t miss any spots.
Polishing Process
Now that you’ve chosen your pads and prepared your surface, it’s time to start polishing.
1. Start with the Coarse Pad: If you’re working on a surface with visible imperfections, begin with a coarse pad. Attach it to your polishing machine, set the speed to low, and apply gentle pressure as you move the pad over the surface in circular motions. Always keep the surface wet to minimize dust and heat. As you work, you’ll start to notice the rough patches smoothening out.
2. Switch to a Medium Pad: Once the coarse pad has done its job, switch to a medium grit pad to refine the surface further. This step is important to eliminate any remaining scratches from the coarse pad and further smooth out the surface.
3. Finish with a Fine Pad: To achieve a high-gloss finish, move on to the fine grit pad. This step may take longer, but it’s worth the effort. Keep the surface wet, and work slowly in overlapping circular motions. As you continue polishing, you’ll notice a beautiful shine developing.
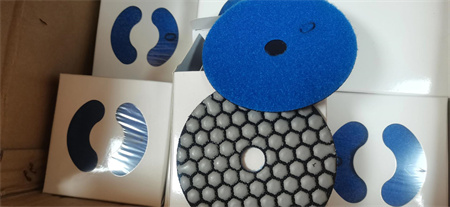
4. Buff for Extra Shine: If you want an even more mirror-like finish, you can follow up with a buffing pad. Buffing gives the surface that ultra-glossy look that makes your stone or tile truly pop.
Tips for Success
– Don’t rush: Polishing can be a time-consuming process, and rushing through it will likely lead to uneven results. Take your time and allow each pad to do its job before moving to the next.

– Maintain water flow: Constant water flow is key to preventing the pads from overheating and to keep the dust down. Don’t neglect this step, as it will make the process smoother and less messy.
Clean and Protect
Once you’ve achieved your desired level of shine, take the time to clean the surface thoroughly to remove any slurry or leftover residue. You can use a microfiber cloth or mop for this. Additionally, you might consider sealing the surface, especially for porous materials like marble or granite, to protect the finish and make future cleaning easier.
Final Thoughts
Using diamond polishing pads at home can be a rewarding and cost-effective way to restore and enhance your surfaces. While it may seem challenging at first, with the right preparation, equipment, and technique, you’ll soon be polishing like a pro. So, roll up your sleeves, grab your diamond pads, and enjoy the process of transforming your home’s surfaces into something extraordinary.