How to Adapt Diamond Pads for DIY Craft Projects
Diamond pads are a game changer in the world of DIY crafts. Whether you’re a seasoned crafter or just starting out, these versatile tools can elevate your projects with stunning details and smooth finishes. Adapting diamond pads for various DIY tasks requires a bit of creativity and the right approach, but once you get the hang of it, the results can be both beautiful and professional-looking. Here’s how to make the most of diamond pads in your next craft project.
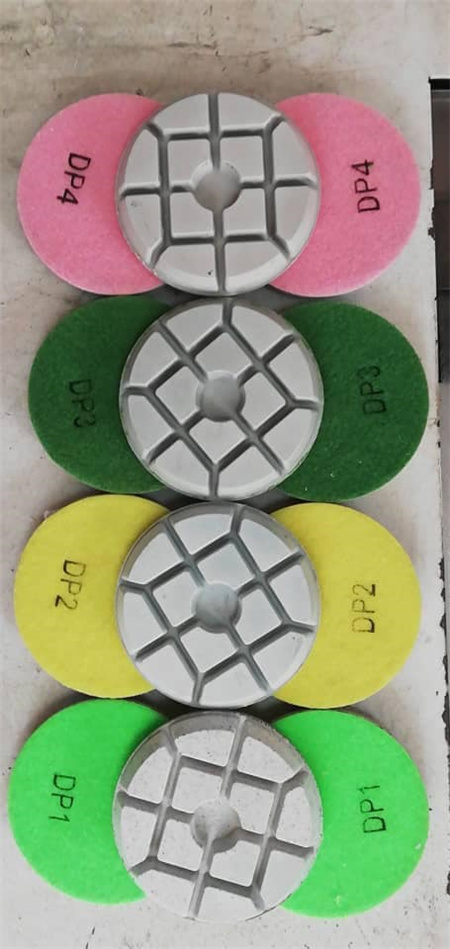
Diamond pads, also known as diamond polishing pads or sanding pads, are typically used in industries like stonework or car polishing, but they’ve found their place in the DIY world, too. Their gritty texture is ideal for smoothing rough surfaces, polishing, and creating intricate designs on a variety of materials. If you’ve ever wanted to add a bit of sparkle or precision to your crafts, these pads are your secret weapon.

Before you start, it’s important to prepare the surface you’re working with. Diamond pads are known for their abrasiveness, so they can work wonders on rough or uneven surfaces. Whether you’re working with wood, glass, ceramic, or plastic, the first step is to clean the material thoroughly. Any dust or dirt will interfere with the polishing process. If you’re working with wood, it’s a good idea to sand it down lightly before using the diamond pad, especially if the wood has imperfections or rough patches that you want to smooth out.
2. Choosing the Right Diamond Pad Grit
Not all diamond pads are created equal. They come in various grits, ranging from coarse to fine. The grit of the pad you choose will depend on the type of craft project you’re working on and the level of smoothness you desire. For heavy-duty projects, such as smoothing out large wooden surfaces or rough edges on tiles, you’ll want to use a coarse grit. For more delicate work, like polishing glass or adding finer details to your craft, a finer grit will give you a smoother, glossier finish.
For example, if you’re working with a piece of raw wood and want to give it a polished, professional look, start with a medium grit to remove imperfections, and finish off with a finer grit for a smooth, glass-like finish.
3. Using the Diamond Pad
Once you’ve selected the appropriate grit, it’s time to put the diamond pad to work. Hold the pad firmly against the surface you’re working on, ensuring it’s evenly applied. For best results, use a circular motion while applying moderate pressure. This technique helps distribute the grit evenly and prevents uneven polishing. Don’t rush the process – work slowly and methodically to avoid overworking any one area, which could cause scratches or scuff marks.
For larger surfaces, such as a wooden tabletop or tile, move in overlapping strokes. For smaller, more intricate areas, you can use the edge of the pad to focus on detailed sections. If you’re using the diamond pad on a material like glass or ceramic, it’s essential to be gentle, as these surfaces can easily crack or chip.
4. Experimenting with Textures and Patterns
Diamond pads aren’t just for smoothing; they can also be used to create interesting textures and patterns. If you’re making jewelry, for example, you can use a finer grit pad to create a frosted effect on glass or stones. For an added touch, you can experiment with layering different grits on the same project. A rougher texture combined with a smooth, shiny finish can create an eye-catching contrast.
Some crafters have even adapted diamond pads for use in creating designs on painted surfaces. With the right technique, you can use a diamond pad to lightly distress painted wood or even create a weathered, vintage look. It’s a fantastic way to add dimension and interest to your projects without needing advanced tools.
5. Cleaning and Maintaining Your Diamond Pads
After you’ve used your diamond pads, it’s important to clean and maintain them for future use. Diamond pads can last for a long time, but they do need some care. Rinse the pads under water to remove any debris, and if necessary, scrub them lightly with a brush to keep the abrasive surface in good shape. Avoid using harsh chemicals, as they can damage the pads. Once cleaned, let them air dry completely before storing them in a cool, dry place.
In addition to regular cleaning, make sure you’re using the right pad for the right project. If you’re working with a particularly tough material, it might be worth investing in a new set of pads to ensure consistent performance and results.
6. Taking Safety Precautions
While diamond pads are incredibly useful, it’s important to use them safely. Always wear protective eyewear and gloves when using diamond pads, especially if you’re working on materials that might cause dust or debris to fly. Additionally, if you’re using electric tools with your diamond pads, be sure to follow the manufacturer’s guidelines for safety and proper use.

Diamond pads are an incredibly versatile tool in the DIY crafter’s arsenal. Whether you’re polishing, sanding, or even creating unique textures, these pads can take your craft projects to the next level. By choosing the right grit, applying the correct technique, and taking the time to experiment with different materials, you can unlock endless possibilities for your creations. The best part? Once you adapt diamond pads to your projects, you’ll wonder how you ever crafted without them!